Python script to export excel file data to amazon dynamoDB table
Python Script which read an excel file and upload its data to DynamoDB .
This script will take input of file-name as a command line argument. It’ll prepare list of data which needs to be stored, and finally these data will be uploaded to dynamoDB.
Required python library: xlrd , boto3 , os, sys.
i am assuming reader is not a experienced or pro developer, so i’ll go step by step. Please read till end for complete understanding.
Before going to implementation part, lets take a look at excel file. This file contains a catalog of products, categorized in different Product category. But we don’t need to bother about category of product. our final goal is to fetch required data from this file and add these data to our dynamoDB table.

Finally, This is how our dynamoDB table will look like after running this script:

Now lets get started,
Step 1:
- Login to aws console.
- Create a dynamoDB table, name- “Product-table”, with primary key- “pkey”.

- Create a python file somewhere in your file system in which we’ll write our script. in my case it is under C:\Users\rkumar3\Documents\product:

- Add your aws access key and secret key to your environment variable in following variables, which we will use to create session for accessing dynamoDB.

Step 2:
finally, lets start coding:
- Open your python script and import all python libraries at top of file which i mentioned earlier. i.e xlrd , boto3 , os, sys.
- Store title of each column of our excel file, dynamoDB table name, value of environment variable in a variable, declare these variable just below import section .

Now, implement following action in main function:
- Read file name from command line argument using “sys” python library. file_loc = sys.argv[1]
- Open this excel file using method open_workbook() which lies inside “xlrd” python library.
- Fetch list of sheets available in that excel file(in our case there is only one sheet) using method sheet_names(), it will return a list of sheets available in excel file.
- Create aws session using Session() mehtod which lies inside “boto3” python library. this method will require aws access key, secret key, region as parameters.
- Iterate over list of sheet, and for each sheet call read_sheet() function (it’s a user defined function), this function will receive sheet as a input and return list of data which are there in that sheet(we’ll talk about this function later).
- After getting list of data we call put_item_to_product_table() (this is also a user defined function), this will take 2 inputs i.e aws session and list of data. and it will add data to dynamoDB table.

Lets talk about read_sheet() and put_item_to_product_table():
read_sheet():
- It takes sheet as a input.
- Inside this function we iterate over each row of that sheet (get row by using sheet.row_values(index_of_row); to get length of row use sheet.nrows ).
- For each row in excel sheet, check if that row is a valid or not using function is_valid_row(). wondering why this is required? check following screenshots, you will get an idea which row is valid and which is invalid.


so, basically we have to store data of only valid rows in dynamoDB table.

- first valid row will only have title .

- For each valid row, create a dictionary with key = title of that column using function get_row_with_title(), which receive title and row as input and return a dictionary.


- Append this to dictionary to a list. prepare dictionary for all valid rows and append to same list. and return that list.
here is complete code of read_sheet()

put_item_to_product_table(session, data):
- Takes aws session and list of data as input
- Iterate over list of data and upload each data to “Product-table” in dynamoDB.
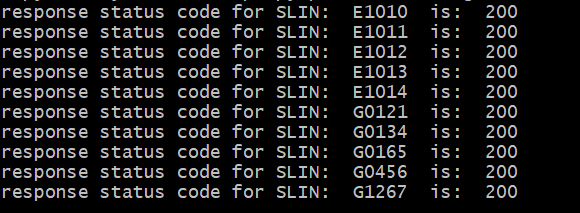
- for each transaction of dynamoDB, a log will be printed with status code of transaction.

Step 3:
Enough of coding and discussions, now its time to run our script. open your command prompt and navigate to the folder where we have stored our script, and run this command:

you will get following as output:
Now, check your “Product-table” in dynamoDB. you will find all those data from excel stored in table.
Find complete script and excel file in my Github repo.
Comments
Post a Comment